
Chefs Studio Journal
These birds had to die for someone to treat them like this
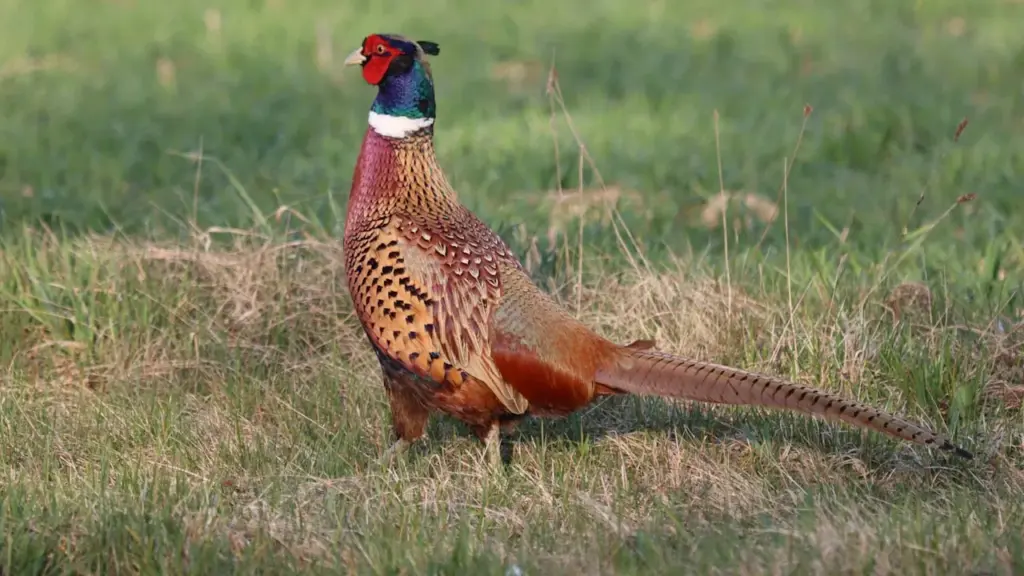
TL;DR: Badly prepared game birds on social media are not just an aesthetic issue. When a wild bird has been shot and brought to the kitchen, it deserves proper preparation. Sloppy plucking and careless presentation is a failure of professional standards and basic respect.
Some photographs on Instagram stopped me cold this week. Not in a good way.
It is game season. Birds are being shot, chefs are posting, and somewhere between the field and the plate, something has gone very wrong indeed. I have been shooting game for most of my adult life, I have written a game cookbook, and I have run professional kitchens long enough to know that what I saw in those images was not a bad day. It was a habit. And habits like that need calling out.
These Birds Had to Die for Someone to Treat Them Like This
Let me be plain. If you are going to put photographs of your cooking on social media, you are inviting scrutiny. That is the deal. You are saying, ‘look at this, isn’t it good.’ So it had better be good. Or at the very least, it had better be honest. What I saw was neither. Badly plucked birds, hairs still visible on the finished dish, feet hacked off at the wrong joint, skin torn, presentation an afterthought. The sort of thing that would have earned a sharp word in any kitchen worth its salt.
But here is the thing that actually bothers me more than the technique. These were wild birds. They lived proper lives, they were shot cleanly (one assumes), and then they ended up being treated as though they were an inconvenience. That is not good enough. If you are willing to cook and serve game, you take on a responsibility. The least you can do is prepare it properly.
Why Proper Game Bird Preparation Matters
Cooking does not begin when the pan goes on the heat. It begins the moment you take delivery of the bird. How it is handled from that point forward determines everything that follows. A Pheasant that has been carelessly prepared will not become a magnificent dish through clever saucing. It will remain a carelessly prepared pheasant, dressed up and hoping nobody notices.
Proper technique is not fussiness. It is respect for the ingredient. It also, incidentally, produces far better results. A bird that has been correctly plucked, singed, drawn, and trussed will cook more evenly, look considerably better on the plate, and taste the way it should. There is a reason the old methods exist. They work.
How to Prepare a Game Bird Properly: Step by Step
This applies to pheasant, partridge, grouse, and most other feathered game. The principles are the same. The care required is the same.
- Pluck the bird properly. Remove every feather, working down to the knee joints and including the parson’s nose. Take your time and work methodically. Pull the feathers with the grain where possible, not against it, and use a firm but controlled grip. Rushing this step is how you tear the skin, and torn skin means dry meat during cooking. There is no shortcut here worth taking.
- Singe off the fine hairs. Plucking removes the feathers but not the fine down-like hairs that cover the body. These will not come away by themselves during cooking either. Pass the bird quickly over a gas flame or use a cook’s blowtorch to singe them off. It takes thirty seconds. The photographs I saw showed hairs still clearly present on the finished dish. Thirty seconds.
- Remove the feet correctly. Cut just above the ankle joint with a clean, sharp knife. Not below the knee with a cleaver. The joint is there for a reason and cutting at the right point gives a clean, neat result. If you are roasting the bird whole, the centre toe can remain. Remove only the two outer toes and the rear one.
- Deal with the neck carefully. Cut as close to the body as possible but leave the neck skin intact, trimming it just short of the head. You will need this skin to cover the breast during trussing, and it protects the meat from drying out in the oven.
- Draw the bird. Before you do anything else, loosen the windpipe, crop, and gullet from the neck skin. Then make a small, neat incision just above the vent and remove the entrails cleanly. Loosen the lungs from the back of the rib cage first – they can be stubborn. Do this carefully. Any puncture of the intestine at this stage makes a mess that is entirely avoidable.
- Remove the wishbone. This is the step most people skip and most people should not. Ease back the skin at the neck end, locate the wishbone, and use a small knife to carefully cut around and free it. Removing the wishbone before roasting makes carving considerably cleaner and easier. It takes a little practice but it is worth acquiring.
- Truss the bird. Trussing keeps everything in place during cooking, helps the bird cook evenly, and makes for a far better-looking result on the plate. Use proper butcher’s twine, not anything else you happen to find in the drawer.
A Word on Skinning Instead of Plucking
I know that skinning a bird is quicker. I am not naive about time pressures. In a domestic kitchen, when it is a Tuesday night and you have a brace of pheasant and a hungry family, I can almost forgive it. Almost. But in a commercial kitchen, in a restaurant, being run by someone who is posting the results on social media as evidence of quality? No. That is not acceptable. The skin is where a great deal of the flavour and fat sit. It bastes the meat during cooking. Roasting a skinned game bird is an uphill battle from the start.
Is It the Training, or Is It the Attitude?
I have been asking myself this question since I saw those photographs. Is the problem that people genuinely do not know how to prepare game birds properly? Or do they know and simply cannot be bothered? I suspect, honestly, it is a mixture of both. Some of the responsibility lies with culinary education, where classical preparation skills have been squeezed out in favour of other priorities. But some of it is simply a lack of care. And a lack of care in the kitchen is a choice.
If you do not know how, ask. Seriously. Ask someone who does know. Read. Watch. Practise on a bird before service rather than during it. Nobody worth listening to will think less of you for admitting a gap in your knowledge. They will think considerably less of you for pretending it does not exist and posting the results on Instagram.
Frequently Asked Questions About Game Bird Preparation
Do I really need to pluck a pheasant, or can I just skin it?
You can skin it, and plenty of people do. But if you want the best result from a roasted bird, you really should pluck it. The skin protects the meat, helps it baste itself during cooking, and carries a great deal of flavour. Skinned pheasant has a tendency to dry out, particularly the breast. In a professional context, skinning should be a last resort, not a default habit.
What is singing and do I need to do it?
Singing is the process of passing the plucked bird over a flame to remove the fine hairs that remain after plucking. These hairs will not disappear during cooking. Yes, you need to do it. It takes less than a minute and the difference in the finished dish is both visible and tactile. Use a gas hob or a small blowtorch and keep the bird moving so you do not scorch the skin.
Why remove the wishbone before roasting?
Removing the wishbone before cooking makes carving the breast cleanly far easier once the bird is cooked. It is a classical technique that has been standard practice in good kitchens for generations. It also helps the bird sit better during trussing. It requires a small, sharp knife and a steady hand, but it is straightforward once you have done it a couple of times.
How do I know where to cut the feet off?
Cut just above the ankle joint, which is the lowest joint on the leg. You will feel it if you flex the foot. A sharp knife applied at this point gives a clean cut with minimal effort. Cutting below the knee, which is what I see more often than I should, leaves an untidy result and wastes usable leg.
Can these techniques be used on all game birds?
The same principles apply across feathered game: pheasant, partridge, grouse, woodcock, snipe, wild duck, and others. The scale changes and some birds require extra care given their size or delicacy, but the sequence of plucking, singeing, drawing, and trussing is consistent. Adjust your approach to the size of the bird, but not to the standard of your work.
The Bottom Line
- Game birds deserve proper preparation. They are a wild, seasonal, exceptional ingredient and should be treated accordingly.
- Pluck, do not skin, wherever possible. The skin is not an obstacle to cooking. It is part of the ingredient.
- Singe after plucking. Every time. It takes thirty seconds and there is no good reason to skip it.
- Cut feet at the ankle, not the knee. Remove only the unnecessary toes and leave the centre one if roasting whole.
- Draw carefully, remove the wishbone, and truss properly before the bird goes anywhere near an oven.
- If you do not know how, ask someone who does. Then practise. That is how good habits form.
- If you are going to photograph your food and post it publicly as a mark of your skill, make sure the skill is actually there. Because it is easier to cook well than it is to cook badly. It always has been.